This tutorial is about how to create motion blur in your street photography by using long exposures. Plus tips on settings using my images to illustrate what I mean.
Blur the Motion
Why would you want to blur the motion? To me, the answer is simple. It is one of the techniques you can use to create dynamic and impactful street photography.
Street Photography • Blurring Motion
In short, you’ll be adding an element of creativity and variety to your street photographs by blurring the motion occasionally.
So how do we achieve this? We use long exposures.
Long Exposure
To create motion blur we need to use a long exposure, which means using a slow shutter speed.
For street photography we are normally looking to achieve sharp images. That means using a relatively fast shutter speed to freeze the motion (typically 1/250th of a second or faster). We also need to use a small aperture for a deep depth of field to keep everything in focus (typically f8.0 or smaller).
Street Photography • Longer Exposures
However, to achieve motion blur in our street photography we need to use a much slower shutter speed. Think in the range of 1/4th to 1/20th of a second. Using longer exposures is the opposite of freezing the motion. It’s as simple as that.
TIP: Try starting with a shutter speed of 1/20th of a second. Then experiment by going progressively slower, down to around 1/4th of a second and see what works best for you.
Blurred and Sharp
Using motion blur in street photography usually means having both blurred and sharp elements within the image.
Of course you could decide to make the whole image blurry. That technique, done well, can be very effective for creating an intriguing abstract.
But, in my opinion, having everything blurred is more aligned to fine art photography than street. That said, there are no rules. Experiment. It’s fun!
Hang on a minute?
Hang on a minute, we normally use a fast shutter speed to freeze the motion, but now we’re talking about using a slow shutter speed to blur the image AND retain some sharp elements. How do we do that?
Good question!
We need to keep the camera steady! If your camera has image stabilisation (normally called IBIS) and/or your lens is stabilised (normally called VR or IS) it’s much easier these days.
These stabilisation systems enable us to hand hold a camera at slower shutters speeds than were previously possible. This technology is widely featured on entry level equipment and above these days. But you don’t have to rush out and buy new gear.
TIP: If your equipment doesn’t have stabilisation you’ll have to master your handholding technique or find a solid surface to place your camera on to keep it steady. Such as a wall. Or you could use a tripod.
Handheld Settings
I’m fortunate that my current camera has inbuilt stabilisation which makes the process easier and my keeper rate higher.
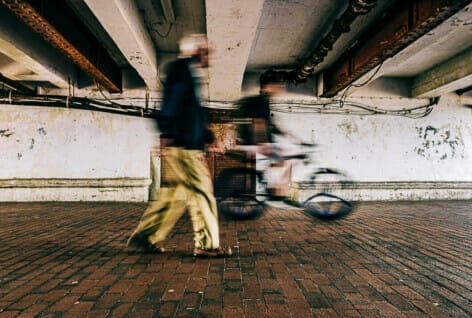
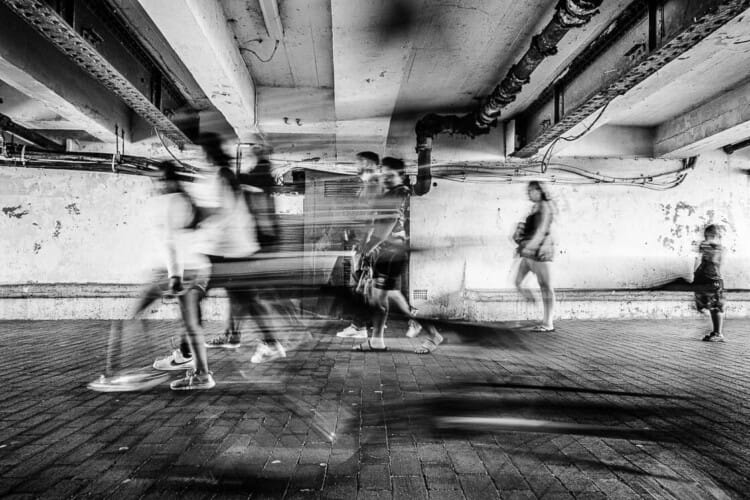
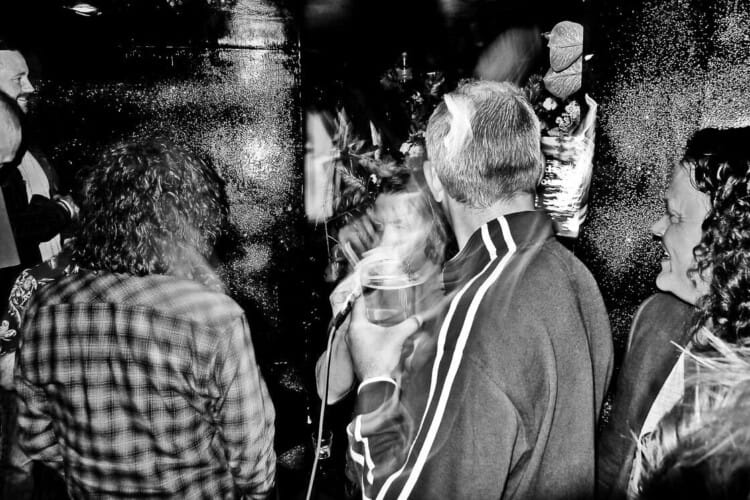
The following images were created whilst handholding the camera. I was able to retain sharp elements whilst blurring the motion.
Detailed Settings
I’ve detailed the settings I used for each image. The shutter speed is the most important setting, with 1/10th second being a good starting point:

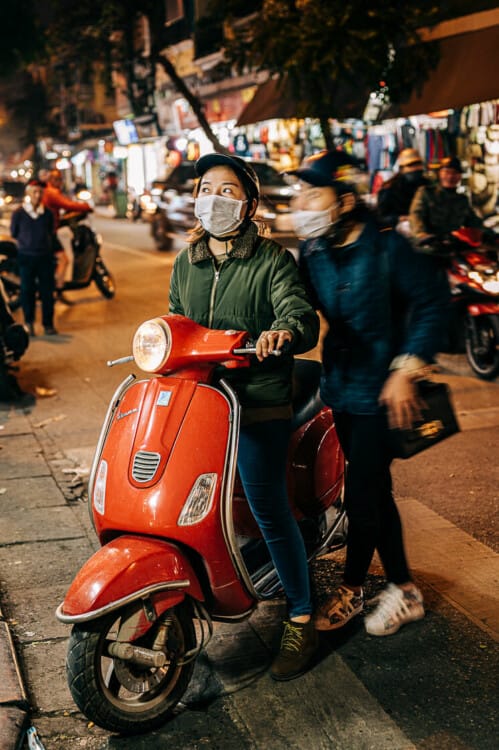
Have you noticed what these images have in common? That’s right, they were all shot in low light. But what about shooting in normal daylight?
The kind of settings I used for these images would be useless in daylight. You’d end up with overexposed images, even if you used the lowest ISO setting on your camera and/or the smallest aperture on your lens.
What we need to do is reduce the amount of light that enters the lens so that we can still use a slow shutter speed. We can do that by using a neutral density filter.
Neutral Density Filter
A neutral density filter (ND filter) is simply a dark piece of glass that reduces the amount of light entering your lens.
Using an ND filter allows you to use slower shutter speeds in daylight without overexposing the image.
There are countless types of ND filter, but the simplest and most versatile type to use for street photography is called a “variable neutral density filter“. This kind of filter has a rotating ring which varies the amount of light reduction.
You don’t need to spend a fortune, I use this mid-priced one and it’s fine.
TIP: If you have lenses with different filter thread diameters simply buy a large filter and some cheap step-up rings to use it on all your lenses.
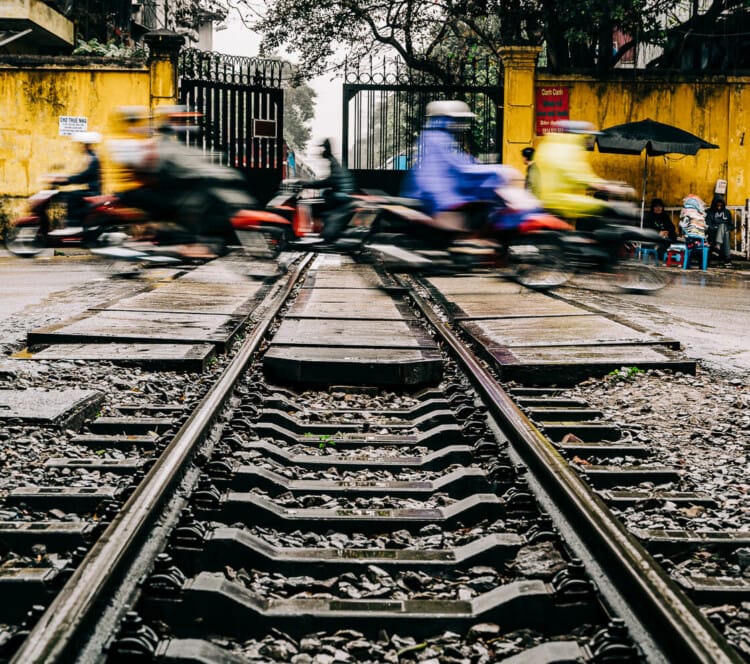
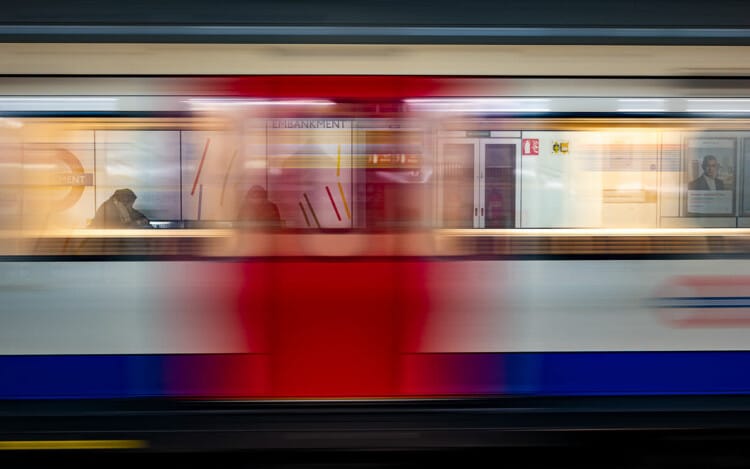
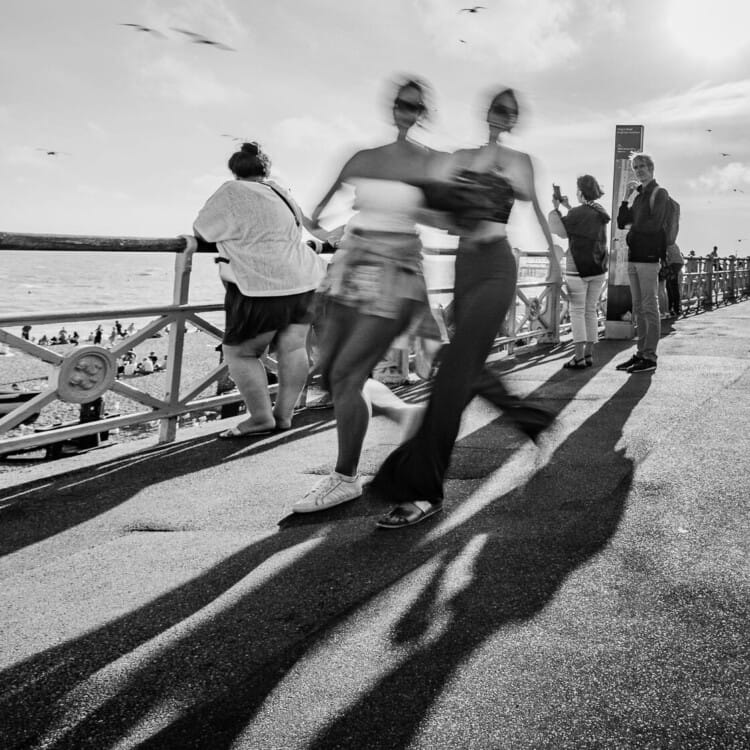
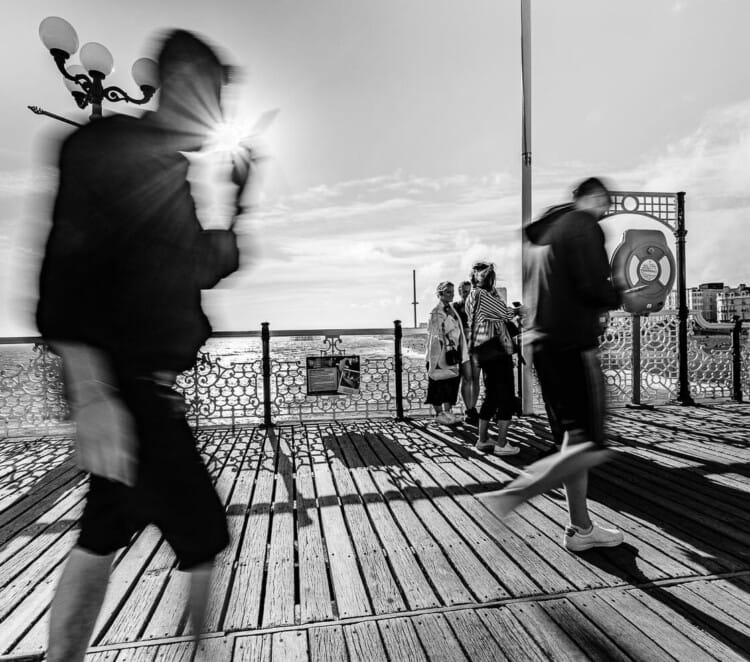
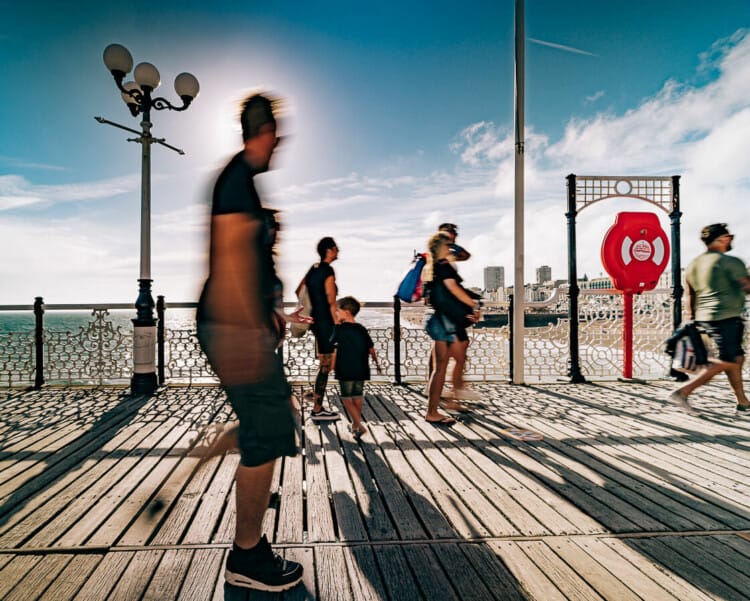
I had to use my variable ND filter to achieve a slow shutter speed for these images shot in bright summer sunshine.
Neutral Density Settings
Once again I’ve detailed the settings I used for each image. The shutter speed is once again the most important setting:
Using Flash
Another way to achieve motion blur is to use flash. This can be the one built into your camera if it has one. Otherwise you could use an external speedlight.
If your camera does have a built in flash it’ll be fine as long as you’re no more than a metre or two from your subject. That’s because the built in flash isn’t very powerful.
The light from your flash needs to be powerful enough to freeze your subject whilst blurring the surrounding motion. The further away your subject is the larger and more powerful flash you’ll need.
TIP: If you’re using a built in flash use a wide angle lens or the wide end of your zoom lens. This will allow you to get close enough to freeze your subject and blur the rest of the image whilst still filling the frame.
Using the built in flash on a compact camera
These images show what I was able to do with a modest compact camera using its tiny built in flash.
Once again I’ve detailed the settings I used. As always the shutter speed is the most important setting:

Slow Sync • Rear Curtain Flash
Somewhere in your camera menu there will be an option to set the flash mode. To create motion blur and sharp elements using flash this must be set to Slow Sync Mode.
There will normally be two choices of Slow Sync – Rear or Front Curtain. Rear Curtain (sometimes called Second Curtain) is the mode you want for pleasing blur.
At first flash photography can be an overwhelming topic. But heres’s an easy way to remember it:
TIP: For any kind of motion blur we need to use a slow shutter speed and slow sync mode allows us to do that with flash. Slow Sync = Slow Shutter. Simple!
Why use Rear Curtain?
Rear Curtain Mode simply means the flash fires towards the end of the exposure, as opposed to Front Curtain Mode which fires towards the beginning.
Why is this important?
It’s important because your blur will fall behind and alway from your subject, which creates a more natural and pleasing result:
TIP: Rear Curtain = Blur to the Rear. Simple!
Like I said, flash photography can be an overwhelming topic. But if you want to learn more about the various ways of using flash in your street photography this article by Digby Fulham over at Streethunters is worth a read.
Conclusion
I want to conclude this article by offering you my top tip of all. What exposure mode to use for motion blur street photography?
Use Manual Exposure Mode!
I always use manual exposure mode for all my street photography and it’s especially useful for motion blur techniques.
Why is that?
It’s because manual exposure is the mode that allows you to choose both the shutter speed AND the aperture. We need to be in control of both:
We need to choose an appropriate shutter speed to freeze or blur the action and an appropriate aperture to ensure we have sufficient depth of field in our images.
But here’s the trick. If we additionally set our camera to “Auto ISO” the camera will still automatically calculate the correct exposure. It does that by setting the ISO to suit your chosen shutter speed and aperture. Simple!
Setup this way manual mode actually becomes another form of automatic exposure, leaving you free to concentrate on composing your image and nailing the shot!
That’s all for now folks, I hope you found this article to be helpful?
Related Topics
You might be interested in more of my photography tutorials and tips here. Alternatively, you can learn more about my work as a international street and travel photographer here or my work as a UK street photographer here.
Share this post:
A good set of tips there, Ray! 🙂
Cheers Greig, hopefully the article provides some useful tips for people!
Thank you!
You’re welcome!
I am happy that I observed this web blog, exactly the right information that
I was looking for!
I’m glad you found the information useful!
Very shortly this site will be famous amid all blog people, due to it’s
nice articles